
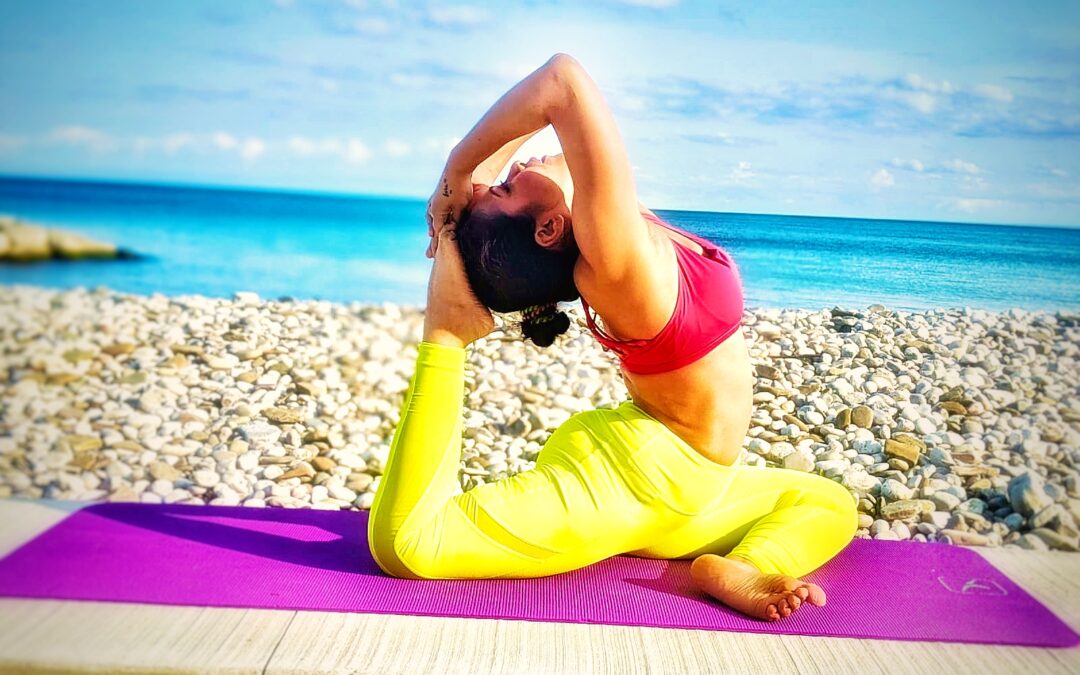
Ek Pada Rajakapotasana or One-legged King Pigeon Pose is a seated back-bending pose and a great hip opener. The pose puffs the chest, making the practitioner look like a pigeon.
This pose prepares your body for backbends and seated postures. It is a great antidote to sitting for long periods. Pigeon Pose stretches your thighs, groin, back, psoas, and hip flexors.
Ek Pada Rajakapotasana has the reputation of being an intense pose. However, there are several variations and ways to use props that make the pose possible for almost everyone. In all four poses discussed in this article, the forward leg is placed in different positions. Do expect to spend some time getting comfortable in each pose before moving on to the next. Additionally, it is important to prepare your body for the pose. You will need to stretch your spine, shoulders, hip flexors, and external rotators of your hip before you practice the One-legged King Pigeon pose.
Preparatory Poses
- Baddha Konasana
- Bhujangasana
- Setu Bandha
- Virasana
Eka Pada Rajakapotasana 1
")
Instructions
- Start on all fours or tabletop position with your knees below your hips. Now bring your right leg up and bend your right knee and bring the right leg forward. Instead of putting your foot down bring your right knee to the floor on the outside of your right hand and top of your right foot behind the left wrist.
- Lower your left knee down. Your left leg should be flat on the floor with your left foot pointing straight back.
- Keep your hips squared. You can also keep a folded blanket underneath your right hip for support.
- Stay in this position for a few breaths. If you feel stable, exhale and lower your torso down into a forward bend over your right leg. Reach your forehead towards the floor and stretch your arms forward.
- Try to keep your weight equally on both sides and hips squared. If this feels like a lot, place a block or blanket under your hip or back knee.
Modifications
- The hip of the leg bent in front of you should touch the floor. If it doesn’t take a blanket underneath the hip on that side. Your weight must be equally distributed between both hips. If the hips do not remain squared on the ground then that will put stress on the knee and twist your sacrum.
- If you are not able to keep your hips squared tuck your toes under and lift your thighs to adjust.
- If you have difficulty bending forward, keep a block under your forearms and/or your forehead.
Variations
1. Bend your left leg and try to grab the left foot with your left hand. Lift your right arm towards the sky.
2. Mermaid Pose
")
Instructions
- Bend your left knee and reach for your left foot with your left hand.
- Hook your left foot into the inside of your left forearm until you can hold it into your elbow crease.
- Now reach your right arm up and take it back to clasp the wrist or fingers of the left hand.
- Keep your pelvis square, stretch your spine and pull your torso forward. Gaze in front or slightly upward.
Ek Pada Rajakaoptasana 2
")
Instructions
- Begin with a low lunge by bending your right knee and place your foot on the floor. Your shin should be perpendicular to the floor.
- Now shift your left leg straight back with the front of the leg and top of the foot on the floor.
- Balance your weight on the right foot and bend your left knee. Your left shin should be almost perpendicular to the floor. To stabilize yourself, push your right knee forward until it goes slightly beyond the toes of the right foot.
- Inhale raise your arms, exhale and take the left foot with your right hand. Then do the same with the left hand. Hold your left foot firmly with both your hands. Lift your chest and drop your head back close to the sole of the left foot. Hold for a few breaths. Try to breathe as smoothly as possible.
- To come out of the pose, bring down the left leg and your arm also.
- Repeat on the other side also.
Modifications
- If you do not feel stable in the pose, practice it with your back shin pressed against a wall and your hands on a chair seat.
- Try to keep your mind calm while maintaining alignment.
- Initially, practitioners are not able to easily grasp the back foot with their hands. So, you can use a strap and loop it around the ball of the back foot. Hold the strap with both hands and gently walk your hands down the strap toward the foot.
Ek Pada Rajakapotasana 3
")
Instructions
- Sit down on the mat with your legs outstretched in front of you.
- Bend the right leg so that the toes point back and are close to the right hip. The right knee should be on the floor and the inner side of the right calf should touch the outside of the right thigh.
- Now take the left leg straight back. Place your hands on either side with palms facing down. Exhale and bend the left knee and try to bring the left foot towards your head. The left shin from knee to ankle should be perpendicular to the floor.
- Exhale, lift your chest out, and lower your head back taking your arms overhead to grab the left foot. If possible you can rest your head on the sole of your left foot. Breathe normally and try to balance in this position for some time.
- To come out of the pose, inhale and release the grip on the left ankle or foot and straighten your left leg. Bring both the legs in front of you in the starting position.
Modifications
- Initially try doing the pose against the wall, resting the shin of the back leg flat on the wall. The back leg’s shin should be perpendicular from knee to ankle.
- You can also put a block underneath the thigh of your bent leg for support.
- Use straps and loop them around your back foot if you are unable to reach it with your hands.
Ek Pada Rajakapotasana 4
")
Instructions
- Kneel and place your hands on both sides of the body on the floor.
- Bring your right leg forward and take your left leg back. Inhale and as you exhale stretch out both legs. Your legs should be in Hanumanasana or yoga splits. Take a few breaths and align your pelvis and center your spine.
- Now push your chest forward, stretch your neck and take your head as far back as you can.
- Bend the left knee and take the left foot close to your head. The left shin should be perpendicular to the floor.
- Exhale and take your left arm overhead and grab the left foot with your left hand.
- If you feel stable here, exhale again and take your right arm also over the head and grip the left foot with your right hand. Stay in this position for a few breaths.
- To release the pose, let go of your grip on the left foot and come back to Hanumanasana. Place your hands on the floor and raise your hips.
- Repeat the pose on the other side also.
Modifications
- This is an advanced deep backbend. Therefore it demands deep flexibility throughout the body and strength to keep the joints stable.
- Extend your spine as long as possible.
- Prop up our hips on a block if you cannot rest them down to the floor.
- Keep your hips squared and find balance.
- If you cannot grab your back foot, take a strap and loop it around your foot and slowly bring your foot close to your head.
- To help you stabilize yourself, practice the pose close to the wall. Your back leg’s shin should be straight up the wall and the other leg extended straight in front.
The Takeaway
To sum up, the One-legged King Pigeon Pose is an advanced backbend that needs precise alignment. It is the king of hip openers. The pose will help you work your stiff hips from every angle. Moreover, if you practice the pose consistently, you will notice more ease in your lower half, as you sit, stand, and walk. And there really is a Pigeon for everyone. You can use props if necessary and also come up with your own variations of the pose.