Are you dealing with back pain? If yes, you are not the only one. Back pain is the most common reason people see a doctor. Back pain can affect your quality of life in many ways. Chronic back pain can lead to physical ailments, affect your mood, and even relationships.
Yoga is a great form of exercise and one of the best ways to soothe back pain and maintain a healthy spine. But as long as you are careful. You have to create a solid foundation for movement and gradually extend and stretch your body.
Yoga poses are especially beneficial to the muscles that support the spine and back. Coordinating your breath and the movement can also deal with the emotional aspects of back pain by helping to decrease stress and reduce anxiety and depression.
Many poses in yoga gently strengthen the muscles of the back and the abdomen. Both the back and abdominal muscles are important parts of the muscular network of the spine, helping the body maintain proper posture and movement. When these muscles are properly trained and conditioned, back pain can be reduced considerably and even avoided.
Keep reading to learn about the five most effective yoga poses that may be helpful in alleviating your back pain.
1. Sphinx Pose (Salambha Bhujangasana)
Sphinx pose is a powerful pose to lengthen and strengthen your back and can also prepare you for deeper backbends. The pose opens the chest, lungs, and lower back. In addition, Sphinx Pose is a variation of the Cobra Pose and is a perfect alternative for people with wrist pain or carpal tunnel, as it is done on the forearms.
Instructions
- Lie down on your chest with the legs extended behind you. Keep your feet together.
- Bring your forearms in front, parallel to each other with elbows under the shoulder. Rotate your thighs inward. This will help lengthen and extend your lower back to protect it.
- Press the tops of your feet firmly into the floor.
- Inhale, press firmly into your palms, and lift your upper torso.
- Press your pubic bone down into the floor.
- Take your head back into a slight backend or keep your gaze in front. Keep pulling your torso back with the help of your arms. Extend your tailbone toward your heels. Stay in the position for a few breaths.
- Exhale and gently lower your torso and head to the floor. Rest with your head turned to one side.
Tips
- If you experience any pain in your back or neck, then only lift your chest as far as is possible for you without any pain.
- To lift your chest higher, engage your legs, and press down through your pubic bone.
- While doing the pose, always try to extend and lift and not bend.
2. Cat and Cow Pose (Marjariasana and Bitilasana)
The Cat Pose is often paired with the Cow Pose to stretch the body, bring warmth, and to make the spine flexible. This combination pose relieves the back and neck pain after a long day at work.
Instructions
- Start with your hands and knees on the floor. Make sure your wrists are directly under your shoulders and knees under your hips. Your knees should be hip-width apart.
- Start with a neutral spine position with your back flat.
- Inhale and as you exhale round your back. Imagine you are pulling your spine towards the ceiling.
- Engage your abs and bring your chin towards the chest. Tuck in your tailbone and drop your head. The pose will look like a cat stretching its back.
- Now move into the Cow Pose by inhaling and arching your back. Lift your head and tailbone and gaze in front or towards the ceiling. This pose should look like the shape of a cow.
- Flow continuously back and forth from Cat to Cow Pose, connecting your breath with your movement. Inhale and do the Cow Pose and exhale and practice Cat Pose. Repeat this 10 to 15 times.
- To relax, sit on your heels with your spine straight.
Tips
- If your wrists hurt, you can do the pose on your forearms.
- Beginners can also put a blanket under their knees in case their knees hurt.
- While doing the Cat Pose, do not try to force your chin to touch the chest.
- Make sure you coordinate your breath with the movements.
- When doing the Cow Pose, start the pose to flow from the tailbone to the neck and head.
3. Locust Pose (Shalabhasana)
Locust pose is absolutely great for lower back pain. It strengthens the muscles along the sides of the lower back. In addition, this pose is excellent for building glute strength and keeping the thoracic spine flexible. Hence, potentially saving you from low back pain.
Instructions
- Lie down on your belly.
- Place your arms by your side and forehead on the floor. Bring your big toes towards each other so that your thighs rotate inward.
- Firm your hips and keep your pelvis and lower belly firmly on the floor. Lift your chest, head, and arms a few inches off the floor. Your arms should be parallel to the floor. Stretch them back through your fingertips.
- Keep your gaze either forward or slightly upward. Stay in the pose for a few seconds or as much as is comfortable.
Tips
- If you are a beginner and have difficulty holding the pose, put a rolled blanket to help you keep the lift of your upper torso.
- If you suffer from any neck injuries, keep your head in a neutral position by looking down on the floor.
- Instead of lifting both your legs off the floor, try lifting one leg at a time. This can help rebalance one-sided sacrum problems.
- Another variation of the pose could be keeping your torso, arms, and forehead on the floor and lifting only your legs. You keep pressing your hands into the floor to help you get more lift into your legs.
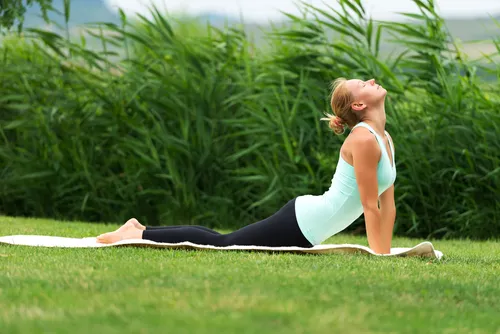
4. Cobra Pose (Bhujangasana)
Bhujangasana can stretch out your spine, making it strong and more flexible. The basic movement is arching the spine, which can mitigate some or all of your disc problems and reduce low back pain. However, if not practiced correctly, it can also cause back pain. Furthermore, the pose can also relieve the stress and fatigue associated with back pain.
Instructions
- Start the pose by lying face down on the mat and toes pointing straight back. Keep your arms beside you with palms facing down.
- Put your hands underneath your shoulders. Engage your thighs and pull your belly up and forward.
- Inhale, press down into the palms and lift your chest, neck, and head off the floor. Keep your neck in line with your spine.
- Bend your elbows slightly and roll the shoulder blades into the upper back. Keep your legs, hips engaged, and pubic bone pressing down into the floor.
- Continue breathing and hold the pose for a few breaths.
- To come out of the pose, inhale, and as you exhale, bring down your chest and head to the floor. Turn your head to one side and move your hips from side to side to release any tension in the lower back.
Tips
- To avoid back pain, keep your elbows slightly bend so that you can move your shoulders further back.
- Another tip to avoid back pain while doing the Cobra Pose is to keep your legs close together. If you keep your legs wide apart, it will make your thighs roll outward and will create compression in your sacrum. Due to this reason, keep your legs together and thighs rotated inward.
- Push your lower body down and back and upper body up and forward.
- Do not hyperextend your neck.
- The pose can be modified for low back pain by keeping a rolled blanket or towel horizontally on the mat under your lower belly.
- Your elbows should point backward and not jut out to the sides.
5. Half Lord of the Fishes (Ardha Matsyendrasana)
This pose can be quite therapeutic for low back pain. It stretches the upper back, neck, side body, and improves spinal mobility. It can strengthen your core and muscles supporting your spine. If practiced properly, this pose can increase spinal rotation and enhance blood flow to the disks. It also stimulates digestion and gives your shoulders, neck, and hips a good stretch.
Instructions
- Sit down on the mat with your legs extended in front of you and rest your arms to your sides.
- Now bend both your knees and place both the soles of your feet flat on the mat.
- Bring your right knee down to the floor and tuck your right foot under your left hip. Place your left foot to the outside of the right knee or thigh.
- Inhale, create length in your spine and raise your right arm towards the sky.
- Exhale and start twisting your right arm outside of the left knee.
- Remain in this position for 4 to 8 breaths, deepening the twist only when you exhale.
- Repeat on the other side.
Tips
- Do not twist too fast and far. Instead, go slow.
- Always do some warm-up to get the blood going through the muscles that extend and flex the spine, such as Cat and Cow Pose or a few rounds of Sun Salutations.
- Keep your back straight and not rounded when you twist.
- If it is not possible to hook the elbow behind the knee, you can try hugging it instead.
- Keep your bottom leg extended instead of tucked under the hip.
- Beginners can keep a cushion under their hips to lengthen the spine.
The Takeaway
Listen to your body’s cues and allow it to guide you as to how far you should go into the pose. Always move within your own range of limits and abilities.
Practicing these amazing poses can help you counteract a long day of sitting. They can not only stretch out your spine, relieve back pain but also rev up your metabolism if your digestion is sluggish and rejuvenate your entire body. Finally, to reap the maximum benefits of yoga for back pain, combine it with other treatments such as medication or other forms of exercise.