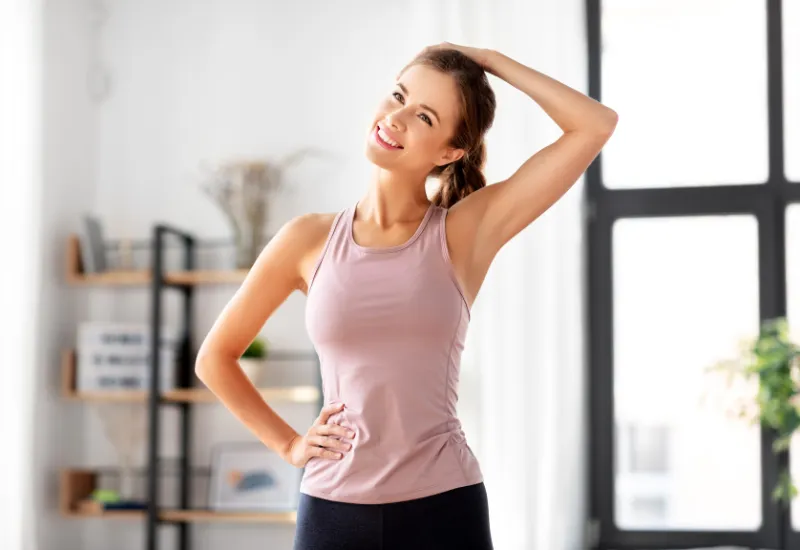
Do you feel discouraged that you can’t touch your toes without bending your knees? Are your stiff muscles a limitation in your daily life? Don’t worry, there is good news! Improving your flexibility and mobility isn’t hard. But it does take time and certain yoga poses can help you attain that.
For most people, one of the most important reasons for starting yoga is to improve their flexibility. However, experts say that flexibility is one of the main benefits of doing the practice regularly.
Flexibility is one of the indications of good physical health. However, your body loses flexibility over time due to a sedentary lifestyle, aging, stress, or wrong posture, and movement habits. The only way to boost your flexibility is not to neglect your yoga practice, whether you do it at home or a yoga studio. Not only will you improve your flexibility, but also build muscle strength and mitigate feelings of stress and anxiety.
Benefits of Flexibility
Enhanced flexibility has myriads of physical benefits and can have a significant impact on the overall wellbeing.
1. Less pain
When you work on opening and elongating your muscles, your body starts feeling better. If you have loose and less tense muscles, you experience fewer aches and pains.
2. Fewer injuries
The more flexible you are, the less likely you are to get hurt. Improved flexibility can curtail the risk of injury. A body with a limited range of movement is at a heightened risk of getting injured. When the muscles are less tense you will have fewer injuries during any physical activity you may choose to do.
3. Better posture and balance
Flexibility can lengthen the muscles in the hip adductors and hip flexors which become tight due to our sedentary lifestyle these days. Improving your flexibility through various postures allows your body to have the right alignment and can also correct any imbalances.
4. Improved strength
As you become flexible you will also experience increased strength. Improved flexibility in the body will allow greater movement in the body as your muscles work more effectively.
5. A positive state of mind
Engaging in poses that open up your body can bring about feelings of relaxation. Once your body feels better, you find it easier to unwind.
Here we have put together 8 asanas that can help you improve flexibility in your muscles and joints. Before practicing these postures make sure your body is properly warmed up.
1. Uttanasana (Standing forward bend)
This pose targets the hamstrings, calves, and torso.
Directions
1. Stand straight on a mat with feet together and put two blocks, beside each other in front of you.
2. As you exhale gently raise your arms and lengthen your spine.
3. Bend forward moving from your hips. Soften your legs and bend your knees slightly. Move your hips and tailbone slightly back while the rest of the body moves forward. Place your hands on the blocks and try to keep your back flat.
4. Bring your weight a bit forward into the balls of your feet so that your hips are over the ankles. Stay in this position for a few seconds.
5. If you are comfortable in this position try to touch the floor with your fingertips or your palms on the floor beside your feet, allowing your head to hang.
6. For a deeper and intense stretch, take your arms behind the legs and grab them with your hands. Try to touch your nose to the knees/shins.
7. To release the pose, inhale and put your hands on your hips. Press your tailbone down and slowly lift your torso.
8. Relax.
Precautions/safety tips
1. To get a sense of what proper distribution of weight feels like practice the pose against the wall.
2. Do not fold from the back as it will lead to a curved spine.
2. Sucirandhrasana (Eye of the needle)
This is an amazing warm-up pose that prepares the body for more intense asanas. It stretches the arms, neck, shoulders, upper back, and hips.
Directions
1. Sit on the floor with legs outstretched.
2. Now bend both your knees and bring the soles of your feet together. Let your knees release out to the sides.
3. Try to bring your feet in as close to your pelvis as is comfortable.
4. Now using your thumb and the first finger hold the big toes of your feet or interlock your fingers around your toes. You can also take your arms behind your back pressing them down to lift your chest.
5. Try to press down the outer edges of your feet. Hold the pose for up to 10 breaths.
6. If you are more flexible, bend deeper and try to touch your forehead to the feet. Try to hold the pose for a few breaths.
7. To release the pose, let go of your toes, straighten your legs and relax.
Precautions/safety tips
1. Avoid this pose if you have a knee injury, or if menstruating.
2. If suffering from sciatica practice this pose by sitting on a pillow.
3. Baddha Konasana (Cobbler’s Pose)
Baddha Konasana stretches your inner thighs, groin, and knees.
Directions
[/et_pb_text][et_pb_text _builder_version=”4.7.7″ _module_preset=”default” text_font_size=”17px” header_3_font_size=”20px”]
1. Sit on the floor with legs outstretched.
2. Now bend both your knees and bring the soles of your feet together. Let your knees release out to the sides.
3. Try to bring your feet in as close to your pelvis as is comfortable.
4. Now using your thumb and the first finger hold the big toes of your feet or interlock your fingers around your toes. You can also take your arms behind your back pressing them down to lift your chest.
5. Try to press down the outer edges of your feet. Hold the pose for up to 10 breaths.
6. If you are more flexible, bend deeper and try to touch your forehead to the feet. Try to hold the pose for a few breaths.
7. To release the pose, let go of your toes, straighten your legs and relax.
Precautions/safety tips
1. Avoid this pose if you have a knee injury, or if menstruating.
2. If suffering from sciatica practice this pose by sitting on a pillow.
4. Paschimottanasana (Seated forward bend)
Paschimottanasana will stretch your spine, shoulders, and hamstrings and can also relieve stress and depression.
Directions
1. Sit down on a mat with legs outstretched.
2. Raise your arms over your head. Inhale and extend your spine up. Now exhale and start bending forward, not from the back but the hips.
3. Keep your back straight while folding forward. If you feel any discomfort you may bend your knees to be able to reach your feet with your hands. Don’t force yourself into the posture. Bend as much as you can without pain. Try to hold your shins, ankles, or your toes, whatever you can reach. Stay in this position for a few breaths.
4. Inhale and come back with your arms raised above your head. Exhale and bring your arms down.
5. Relax.
Precaution/safety tips
1. If it is difficult to sit up straight on the floor put a blanket underneath.
2. If you want to reach your toes, you can put a yoga strap around your feet and grasp it with both hands.
3. As a beginner with tight hamstrings, it would be difficult to bend too much. However, with regular practice, your body will become flexible.
4. Avoid doing this posture if suffering from a back or hip injury or cervical spondylitis, asthma, or even diarrhea. Pregnant women should also refrain from doing this posture after the first trimester.
5. Prasarita Padottanasana (Wide-legged forward bend)
This pose stretches the hamstrings, calves, glutes, and lower back. It also improves hip joint flexibility and posture.
Directions
1. Start by standing facing the long edge of the mat. Take two blocks and put them one over another in front of you. Spread your feet about 3 to 4 feet apart depending upon your height. Turn the toes in.
2. Put your hands on the waist. Inhale and engage your thighs, lengthen your spine, lift your chest, and draw your shoulder blades towards each other. Align your hips with your ankles.
3. Inhale and raise your arms over your shoulders, reaching the ceiling. Exhale and start bending forward with a straight back halfway down and arms also going forward. Shift your weight slightly onto the balls of your feet. Fold from the hip joints and not from the waist. Fold forward as much as you can and place your hands on the blocks in front. Relax and breathe normally as you let your shoulders open. Stay in the pose for a few breaths.
4. If possible you can place your hands between your legs under the shoulders. Walk your hands back trying to bring your fingers in line with your toes and your elbows directly above your wrist. Stay in this position for a few breaths. Exhale and come back into the standing position bringing your feet together.
5. If this is possible, try to touch the crown of your head on the floor and grab your feet with your hands.
6. To release the pose, press firmly into your feet, bringing your hands back to your waist. Inhale and return to the standing position stepping your feet together.
Precautions/safety tips
1. If you have tight hamstrings bend your knees.
2. You can rest your head on a yoga block or bolster also.
3. Bend from the hips and not the back.
4. Come back up from the pose with a flat back as this will strengthen your back muscles.
6. Parsvottanasana (Intense side stretch pose)
This pose will stretch the spine, shoulders, hips, and hamstrings. It will also strengthen your legs, improve your posture, and sense of balance.
Directions
1. Stand with your feet together along the length of the mat. Inhale and spread your feet 3 1/2 to 4 feet apart. Put your hands on the waist and turn your right foot 45 degrees to the right and your left foot perpendicular to the mat.
2. Take two blocks and put them on both sides of your left foot.
3. Exhale and lengthen your torso and rotate it to the left side keeping your hips square.
4. Inhale and raise your arms. Engage your hips, exhale, and start bending. Stop bending when your torso is parallel to the floor and rest your hands on the blocks. Keep your left hip back in line with the right hip. Hold the pose for a few seconds.
5. If you become comfortable in this position, try folding deeper in the pose and touch your fingertips to the floor.
6. You can go deeper into the pose by bending more, letting your nose touch your left knee/shin with hands folded behind your back in reverse namaskar.
7. To release, inhale and lift your torso gently placing your hands on the waist.
8. Repeat it on the other leg also.
9. Relax
Precautions/ safety tips
1. You can widen your stance for more stability.
2. If you feel your heel lifting, practice the pose with the heel pressed to a wall.
3. Beginners can take their arms back and interlock their fingers.
7. Dhanurasana (Bow pose)
Dhanurasana opens your shoulders, chest, and strengthens your back.
Directions
1. Lie down on your stomach keeping your chin on the mat and hands at your sides.
2. Exhale and start bending your knees. Keep your knees hip-width apart.
3. Take your hands back and try to grab your ankles. As you do this, lift your head, chest, and your thighs off the mat. Rotate your shoulders comfortably.
4. Your body at this stage would only be resting on the core. Feel the stretch in your back and your chest and shoulders opening up.
5. Keep your gaze in front and hold the pose for a few seconds, breathing normally.
6. To release the pose exhale and lower your head, chest, thighs, and feet back on the mat. Release your ankles and bring your hands to your side.
7. Relax.
Precautions/safety tips
1. Don’t hold the toes of your feet but the ankles, as they are the safest part of the foot. Grabbing the top of the feet can lead to slipping and you may hit your chest and chin on the floor.
2. Keep your knees hip-width apart to avoid discomfort and straining in the back.
3. When you try to reach out for your ankles, take your arms back, rotate your shoulder slowly and carefully.
4. Don’t try to hold your breath. Exhale when you fold into the pose and come out of it. Inhale when you lift. Breathe normally when you hold the pose. If you hold your breath, your chest will not open up.
5. If it is difficult for you to grab your ankles, place a rolled towel under your thighs to give you some lift. You can also put yoga straps around your ankles and hold on to them. The yoga straps will bring your hands close to the ankles.
6. Do not perform this asana if you suffer from back and neck pain or injury. This pose should not be performed by pregnant women.
8. Upavistha Konasana (Wide-angle seated forward bend)
This pose can increase range of motion in your lower back, hips, and hamstrings and gives them a good stretch. The pose stretches your adductors and lengthens your hamstrings.
Directions
1. Sit on the floor with your legs outstretched in front of you. Inhale and open your legs wide keeping your toes pointing up and feet flexed.
2. Place two blocks one over another in front of you. Keep a cushion underneath your hips to give you stability and making it easier for you to bend forward.
3. Exhale and start bending from your hip joints, lengthening the front of your torso. Your thighs should be in a neutral position, neither rolled forward nor backward. As you bend walk your hands forward and rest your head on the blocks.
4. Keep your front body long instead of collapsing your chest and curving your back. Keep your neck relaxed and knees and toes pointed toward the ceiling. Take deep breaths and hold the pose for a few seconds or as long as comfortable. If you have tight hamstrings and adductors you will experience some sensation as you stretch them.
5. To deepen the pose, you can fold further grabbing your toes and touch your forehead to the floor.
6. To release the pose, walk your hands back and bring your legs together.
Precautions/safety tips
1. Do not round the spine. When you round your spine you put pressure on the disks and strain the muscles of the lower back.
2. When you bend, press down with your thighs as you will be able to lift your spine more.
3. Sit against a wall to support your back.
4. Put a rolled blanket or cushion under the knees for extra support.
The Takeaway
Everybody can’t bend like a pretzel in a few days. Flexibility varies from person to person. Some people are so stiff that if they don’t practice for a week, they are back to square one. Start slow. Stretch slow and only till it feels good. Try to understand how your body feels as you move.
Most importantly be happy and satisfied at whatever stage of the practice you are at. Discover your body’s strengths and limitations and slowly accept them while at the same time pushing yourself a bit further, only as much as is comfortable.