Most of us dread the winter months. The chilly weather and dwindled daylight hours can very easily make you feel blue. Some of us also start experiencing a hiatus in our motivation to stay active. Some start experiencing feelings of depression and anxiety. You can do a lot of things to ease these symptoms. Moving around is the best way to boost your spirits, enhance your heart health, and to keep your mind and body in excellent condition.
Even though you may be tempted to stay snuggled under the blanket, but it becomes all the more important to develop internal heat to keep us healthy throughout the winter season. Just as we tweak our diets according to the season, we have to adapt our yogic practice according to the time of the year. Colds, joint pains, poor blood circulation, depressing, feelings are some of the health risks associated with the winter season. Therefore, it is imperative to practice poses that open your chest and throat to help relieve congestion and also improve your respiratory health.
The following asanas will be extremely helpful in warming up your body to prepare you for the cold weather ahead and getting into shape.
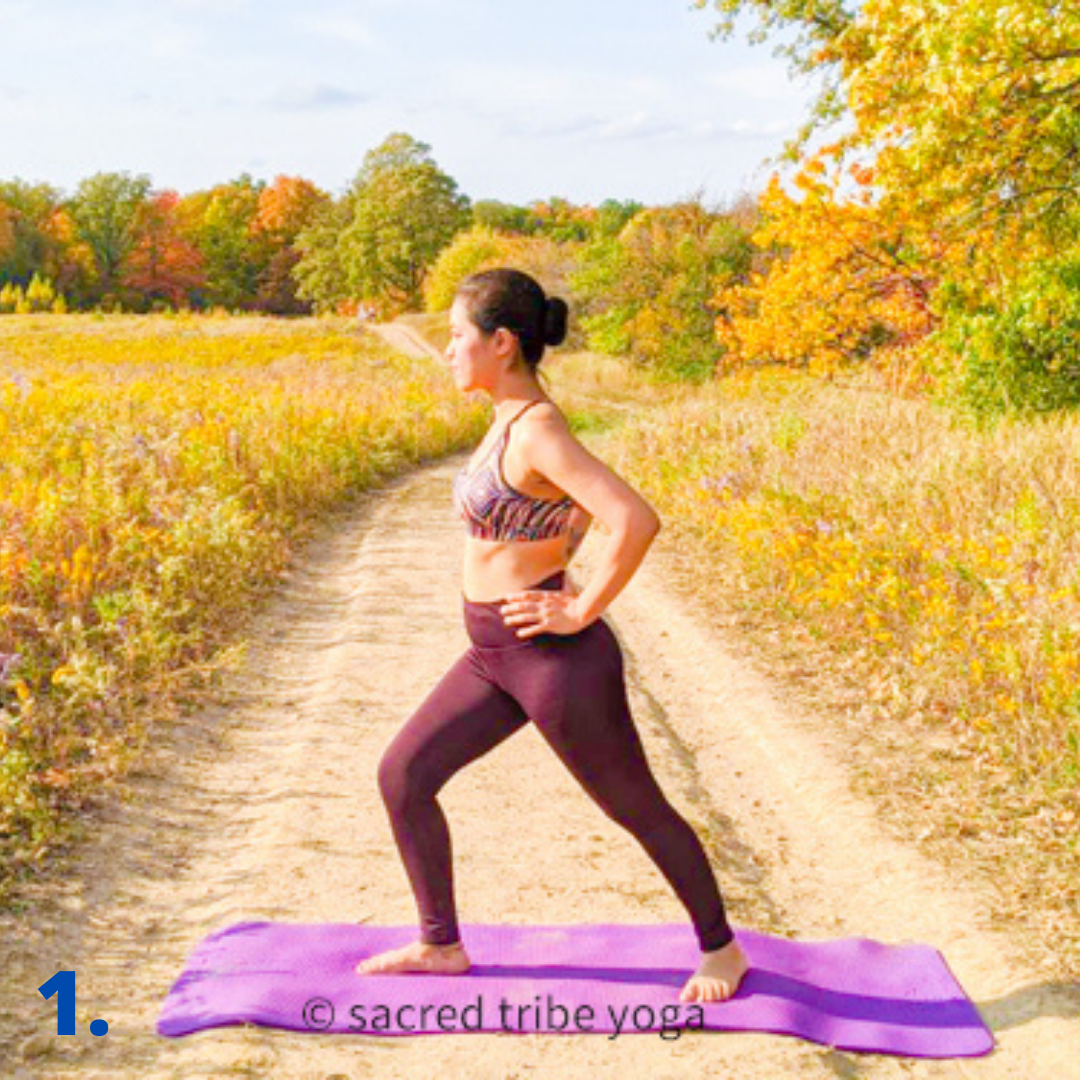
1. Warrior II (Virabhadrasana)
Warrior pose II seems like a simple pose, but it is an immensely powerful pose that is great for core and leg strength. The pose stretches your upper body and creates heat in the body. Warrior II opens your hips, brings your heart rate up, increases your body temperature, and helps you keep warm. This pose also improves your breathing capacity.


Instructions
1. Start by standing facing the length of the mat with feet together.
2. Exhale and spread your feet apart approximately 3 to 4 feet or depending upon the length of your legs and openness in your hips. Keep your heels in line.
3. Turn your right foot so that it is parallel to the mat. Turn your left foot slightly to help you find stability and balance.
4. Now keeping your balance, slowly raise your arms to the sides with palms facing down. Make sure your arms are in line with your shoulders.
5. Turn your head towards your right hand and look at your right hand.
6. Exhale and bend your right leg. Press firmly into your right foot.
7. Extend your spine, relax your shoulders, and push your chest out.
8. Stay in this position, breathing normally for a few seconds.
9. To release the pose, inhale, and as you exhale, come back to the starting position with feet together.
10. Repeat the pose on the other side.
Tips
1. You can use a chair to support the thigh of the front leg by putting a chair under your front bent leg.
2. Practice the pose against the wall behind the back for alignment of shoulders and hips.
3. Keep your stance short if you have tight hips.
4. Make sure that your front knee is directly over your front ankle, as this can strain the knee joint.
5. Keep your hands on your hips if you have a shoulder injury or if you do not have a strong upper body.
6. Focus on a single point.
Modifications
- Hands placed on the hips and shortened stance.
- Chair under the front thigh.
Preparatory poses
- Baddha Konasana
- Supta Padangusthasana
Counter poses
- Bakasana
- Utthita Trikonasana
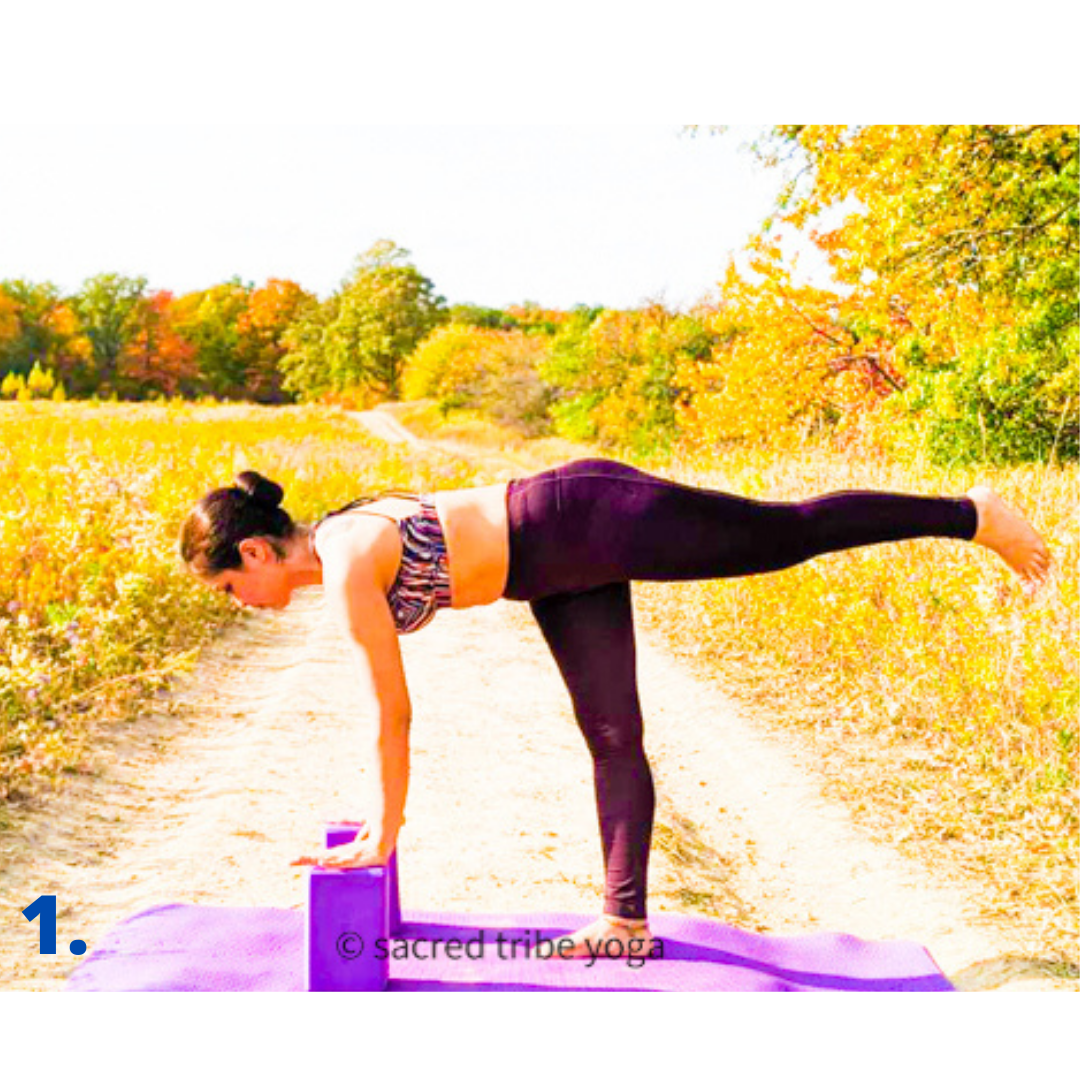
2. Warrior III (Virabhadrasana)
Warrior III is a complete body workout that develops heat in the body, a powerful body strengthener, and great for the cold months. The pose helps you build core strength and also tones the muscles of your legs, glutes, and arms.


Instructions
1. Begin by standing with your feet hip-distance apart facing the top of the mat.
2. Exhale and take your left foot back, keeping arms by your sides.
3. Inhale and take your arms overhead. Bring your palms together or interlace your fingers, pointing the index finger up.
4. Exhale and start leaning forward, bringing your weight into your right foot. Start to extend your left leg.
5. Make sure the standing leg is strong and not locked in the knee. Keep a slight bend in your right leg and left foot flexed (toes pointing down).
6. Move your torso down parallel to the floor to counterbalance your left leg.
7. Keep your neck relaxed and your gaze down. Extend your left leg, fully engaging its muscles so that your right leg, back, arms make a “T” shape.
8. Remain in this pose for a few breaths.
9. To release the pose, slowly bring your left leg down to the right leg and torso to the vertical position.
10. Repeat on the other side in the same way.
Tips
1. Make sure the hips are leveled as the hip of the extended leg tends to start lifting.
2. Use a focal point for your eyes.
3. You can also do the pose in front of the wall with hands pressing against the wall.
4. The quads of the standing leg have to be engaged.
Modifications
1. Place your hands on the blocks put right under your shoulders.
2. Hands in front with palms together in Anjali mudra.
3. Taking your hands back by your hips.
Preparatory poses
- Prasarita Padottanasana
- Uttanasana
- Utkatasana
- Supta Padangusthanasana
Counter poses
- Natarajasana
- Eka pada rajakapotasana
- Halasana
- Hanumanasana
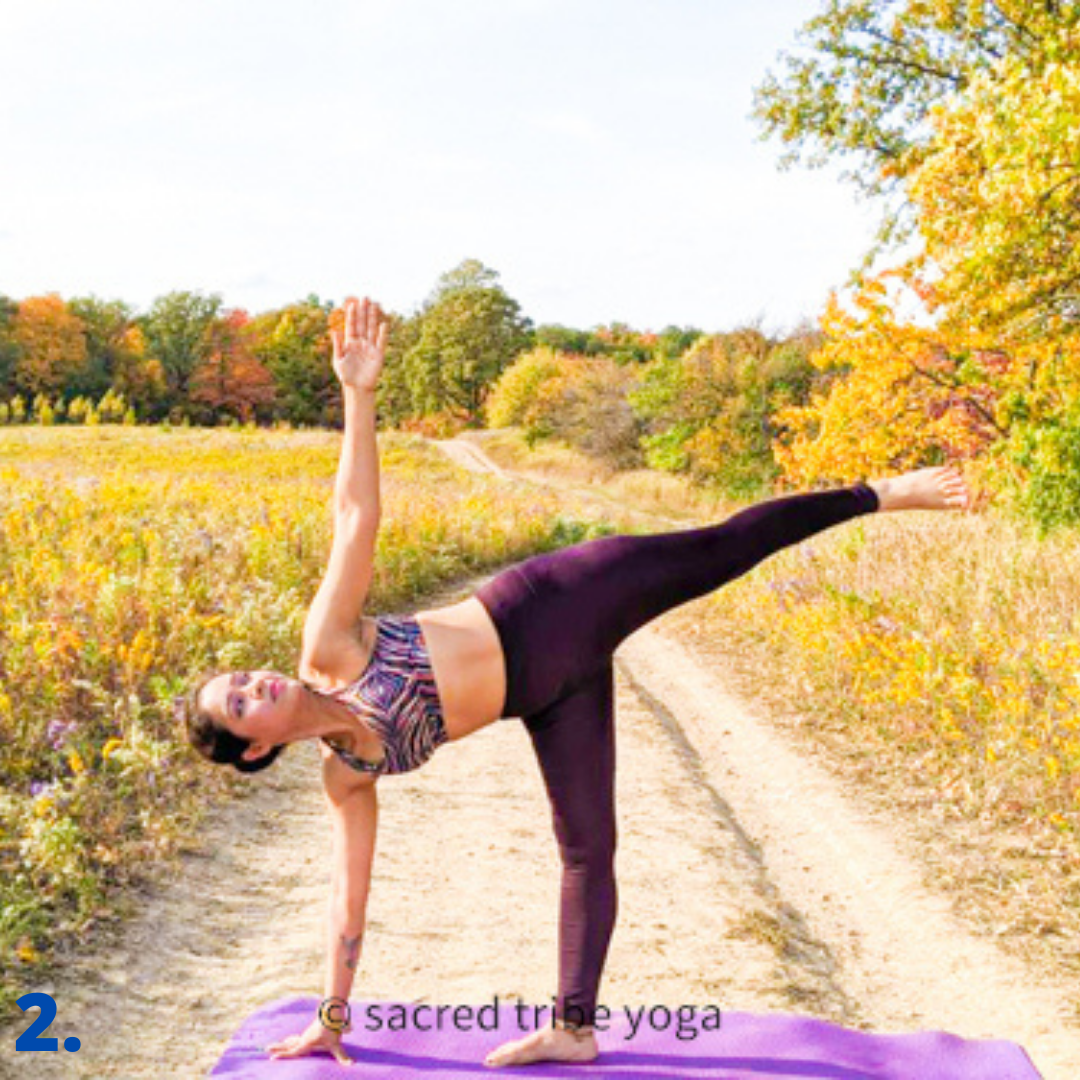
3. Half-moon pose (Ardha Chandrasana)
In this pose, the heart is higher than the head and provides all the benefits of mild inversions, which includes fighting off depression and anxiety. The pose also provides relief from digestive problems such as constipation and indigestion.


Instructions
1. Stand facing the top of the mat with your feet together.
2. Come in extended triangle pose. Inhale and extend your right foot forward. Bend your right knee. Now place your right-hand fingertips on the floor in front of your right foot. You are using your right hand just for balance.
3. Now slowly hinge forward, shifting your weight into your right foot. Lift your left foot off the floor, keeping it flexed. Extend your tailbone to your lifted left foot. Keep your inner left thigh firm.
4. Inhale and roll your shoulders back, and turn your chest upward.
5. Try to balance on the right leg by engaging your glutes, quads.
6. If you have found your balance and feel stable, extend your left hand towards the sky.
7. You can either keep your gaze down or look straight ahead or look at the lifted left hand.
8. Your right foot will only face the top of the mat, whereas the rest of the body faces the side of the mat.
9. Try to stay in the pose for a few seconds.
10. Release the pose by bending your right knee and lowering your left leg back to the floor. Then come back to the extended triangle pose.
11. Repeat on the other side.
Tips
1. If you have balance issues or you are a beginner, then you can use a block under your balancing hand to give you extra length and stability.
2. To avoid discomfort in your neck, focus your gaze down or look straight ahead.
3. Your standing leg’s knee should be facing straight ahead, and not inward.
4. Always keep the chest away from the navel or keep your body from rounding up.
Modifications
- Against the wall
- Pressing raised foot into the wall
Preparatory poses
- Side plank
- Extended Triangle pose (Utthita Trikonasana)
- Warrior III
- Parsvottanasana
- Supta Padangusthasana
Counter poses
- Janu Sirsasana
- Prasarita Padottanasana
- Gomukhasana
4. Camel Pose (Ushtrasana)
Camel pose is chest-opener and can improve your immune system considerably. It is a great choice for improving circulation, warmth, and digestion and can also remove fatigue. The asana can also alleviate a foggy mind, bloating, and constipation.


Instructions
1. Come down to your knees, keeping your legs hip-width apart.
2. Keep your feet flat. Press down with the top of your feet and shins into the mat.
3. Place your hands on your hips and turn your thighs inward. Keep your hips directly over your knees.
4. Inhale and engage your lower belly and lengthen your tailbone down toward the floor.
5. Exhale, lift your torso, pushing your hips down, and start leaning back. Turn your arms outward, and do not squeeze your shoulder blades. If you are a beginner, keep your hands at the back of their pelvis.
6. Allow your head to drop back without any straining.
7. If you are comfortable in this position, you can deepen the pose by trying to hold your heels.
8. To come back, bring your hands back to your hips. Lift your torso back up by
pushing your hips down and slowly bring your head up.
Tips
1. If you can’t grasp your heels, you can tuck your toes to give your heels a lift.
2. You can also use blocks on both sides and rest your hands on them.
3. If you want to deepen the pose, you can also try holding opposite ankles by crossing your forearms.
4. Keep your pelvis stable and lengthen your sternum toward the sky.
5. Keep your neck comfortable throughout the pose.
6. To keep your thighs, hips, and pelvis aligned, practice the pose facing the wall. As you lean back with your thighs touching the wall, press your pelvis against the wall. Keep your thighs close to the wall even if it gets difficult to touch your heels.
7. You can also place a cushion or a folded blanket under your knees to easily get into the pose.
Modifications
- Thumbs on the sacrum and toes tucked under
- Pressing thighs against the wall
Preparatory poses
- Bhujangasana
- Dhanurasana
- Shalabhasana
Counter poses
- Balasana
- Sarvangasana
- Baddha Konasana
- Upavistha Konasana
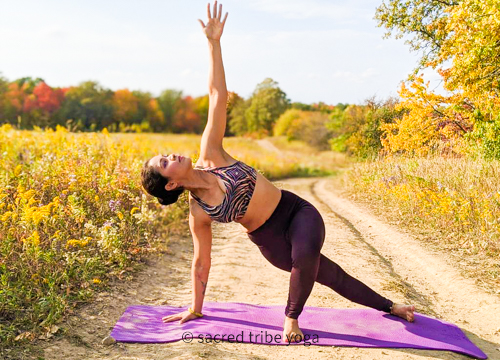
5. Side plank (Vasisthasana)
Vasisthasana is a great pose for strengthening shoulders, wrists, elbows, and firms and tones your body. The pose also opens the chest and heart. When your chest and ribcage expands, it helps increase your lung capacity and oxygenation to the body. The pose can also help build abdominal strength reducing back strain.


Instructions
1. Start with Phalakasna (plank pose). Shift your weight to your right hand, keeping it towards the long edge of the mat. Lift your left hand off the mat and raise it towards the ceiling.
2. Turn your torso completely towards your left foot and place your left foot over your right foot.
3. Straighten your legs and flex both feet strongly.
4. Your left hip should sit directly over your right hip. Keep your hips lifted and ensure they do not sag down.
5. Look up at your left hand’s fingertips.
6. Hold the pose for a few breaths.
7. To release the pose, bring your left hand and left foot to the floor and come into the plank pose.
8. Repeat the pose on the other side.
Tips
1. Keep your spine straight for the right form of the pose.
2. Keep your core engaged to stay in the pose.
Modifications
- One knee bend and leg placed on the floor
- Forearm side plank
- Placing one leg in front of the knee of the other leg.
Preparatory pose
- Plank pose
Counter poses
- Child’s pose
- Janu Sirsasana
The Takeaway
Yoga can make you strong and prepared for the cold wintry days ahead. If you haven’t tried yoga yet, give it a go this winter! Practice these yoga poses regularly and get your license to chill! These yogic postures will give you the warmth and strength to ward off common infections and keep both your mind and body in a stellar state.


