
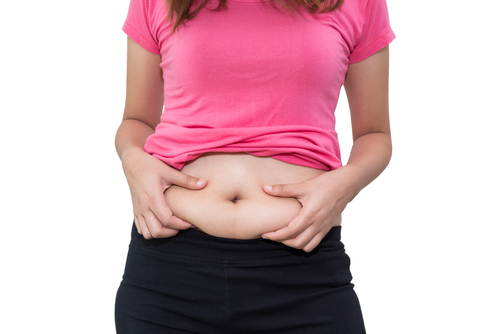
Have you been fighting the battle of the bulge to no avail? Does your unwanted belly “baggage” bug you? A healthy and flat tummy is imperative for all body functions. Maintaining the abdominal muscles in good condition is important for overall fitness. Having excessive belly fat is extremely unhealthy and a risk factor for a lot of diseases like Type 2 diabetes, cardiovascular disease, and cancer. A big, protruding belly can also put undue pressure on the spine.
So, what can you do about it? You don’t need any fancy equipment – just a yoga mat! Some yoga poses can be extremely beneficial in maintaining a taut and firm abdomen. An hour of practice is all you need. Practice the following 7 poses religiously to get rid of excess belly fat and have a toned abdominal area.
1. Setu Bandhasana (Bridge Pose)
")
Instructions
1. Lie down on your back. Bend your knees with soles flat on the mat and your feet hip-width distance on the floor. Place your arms alongside your body with palms facing down.
2. Inhale, press the back of your shoulders and elbows. Plant your feet firmly on the floor and lift your chest and hips towards the ceiling. Keep your gaze straight up.
3. Roll your shoulders back underneath your body. Straighten your arms below your pelvis, pressing your forearms into the mat, and interlock your fingers. If you are comfortable in this position, then try grabbing your ankles.
4. Engage your inner thighs to keep your knees from spreading out.
5. Hold the pose for at least 5 to 10 breaths.
6. To release the pose, exhale and unclasp your hands, bringing the spine back to the floor.
Tips
1. If you have a problem lifting your hips off the floor, place a bolster or block under your sacrum. This will support your pelvis.
2. For a deeper stretch keep your buttocks relaxed and use only your thigh muscles to lift the hips and upper body.
3. If you are unable to clasp your hands underneath your torso due to tightness in your shoulders, then keep your arms alongside your body with your palms pressing down on the floor.
4. You can also hold the outer edges of your mat to lift your hips and chest.
5. If you find your knees falling wider than your feet as you rise, you can put a yoga block in between your thighs and squeeze into it as you rise.
Benefits
1. The pose tones your thighs, and hips.
2. Helps you burn belly fat.
3. Works up your chest, shoulders, and arms.
2. Parivrtta Utkatasana (Twisted chair pose)
")
Instructions
1. Stand with your feet together.
2. Inhale, lengthen your spine and raise your arms above your head alongside your ears joining the palms together.
3. Exhale and shift your weight on the heels of your feet. Bend your knees and send your hips down on an imaginary chair.
4. Lower your arms down with your hands in the folded position in front of your heart.
5. Exhale and twist your torso towards the right side. Keep your knees together.
6. Press your left elbow against the right knee and keep your gaze upward.
8. Hold the pose for at least 30 seconds.
9. Inhale and come back to the original position with your hands folded and standing facing the top of the mat.
10. Repeat on the other side.
Tips
1. If you are a beginner, you can stand with your feet at hip-distance apart.
2. If it hurts to look upwards, turn your gaze to the floor.
3. For a deeper practice lift your heels and balance on the balls of the feet with knees bent.
4. Keep a slight arch in your back and do not keep it flat.
5. Squeeze your thighs together.
6. To protect your knee joints, do not allow your knees to move in front of your toes.
Benefits
1. The twisted chair pose works on the quads, glutes, and abdominal muscles.
2. The twisting movement helps the digestive system.
3. Sarvangasana (Shoulder stand)
")
Instructions
1. Lie down on your back, feet together and hands beside the body.
2. Inhale and as you exhale bend your legs and bring the feet close to your hips.
3. Now with one swift movement raise your legs, hips, and back with the elbows supporting the lower body. Your elbows should be placed on the floor and support the waist with your hands. You should be standing high on your shoulders.
4. Engage your core, thighs, legs, and point your toes out.
5. Keep your legs together while balancing on the shoulders and gazing toward the navel.
6. Hold the pose for 30 to 60 seconds breathing normally.
7. If you feel any pain in your neck, immediately release the pose.
8. To release the pose, inhale and as you exhale lower your back, hips, and legs to the floor.
9. Lie down flat on the mat and relax.
Tips
1. If you are a beginner, and struggling with maintaining balance, practice doing the pose by resting against a wall while in the head-low position.
2. Keep your upper arms in and your elbows parallel to each other.
3. Take enough support from your arms so that your neck is under no pressure or pain.
4. Do not get up immediately after doing the pose and follow it up with Shavasana.
5. Do not go up or come down with a jerk.
6. You can use a folded blanket under your shoulders to protect your neck from the flexed position.
7. Do not practice this asana if you suffer from diarrhea, headaches, neck or back injury, and high blood pressure, or any condition where you should not allow your head to be lower than your heart.
Benefits
1. Strengthens the upper body and the abdominal muscles.
2. Boosts your metabolism and thereby helps to lose weight.
3. Helps balance thyroid levels.
4. Naukasana (Boat Pose)


Instructions
1. Lie down on your back on the mat keeping your feet together and place your arms alongside your body.
2. Inhale and as you exhale lift your upper body and feet off the floor with knees bend.
3. Stretch out your arms and try to reach your feet.
4. Maintain the posture at 45 degrees. Keep your gaze on your toes.
5. If possible straighten your legs and balance on your sitting bones.
6. Hold the pose for 5 to 10 seconds, breathing deeply while maintaining the pose.
7. Repeat the pose 3 to 4 times.
Tips
1. As you try to balance on your sitting bones, do not round your back.
2. Beginners can bend their knees instead of keeping them straight.
Benefits
1. The pose stretches, compresses, and strengthens the abdominal area.
2. If practiced religiously this pose can be beneficial in burning belly fat.
3. Improves the functioning of the liver and intestines.
5. Phalakasana (Plank pose)

Instructions
1. Lie down on your stomach.
2. Bring your palms under your shoulders and tuck your toes.
2. Inhale and lift your upper body and knees. Bring your torso forward until your shoulders are directly over your wrist.
4. Keep your legs straight. Do not bend your knees.
3. Tuck your tail bone under so that your hips, legs, and upper body are in one straight line.
4. Hold the position for at least 10 to 15 breaths.
5. To release the pose, lower your knees to the floor and rest in the Child’s pose.
Tips
1. Beginners can build strength by practicing half plank with their knees on the floor.
2. Engage the thigh muscles to develop the abdominal strength you need for the plank pose.
3. Do not let your hips sag too low or go up too high. Keep your body – from head to shoulders to heels in one straight line.
4. Do not lock your elbows, instead keep a slight bend in them to avoid any injury.
Benefits
1. Helps develop a stronger and tighter stomach by working all the muscles of the core.
2. Super effective in losing belly fat.
3. Improves your posture, endurance and determination.
6. Bhujangasana (Cobra pose)
")
Instructions
1. Lie down on your stomach with forehead placed on the floor.
2. Keep your legs together and place your toes flat on the floor with heels slightly touching each other.
3. Bring your palms under your shoulders, inhale and lift your head, chest, and abdomen, keeping your navel on the floor.
4. Try to pull your upper body back with the support of your hands.
5. Keep your heart out, back relaxed, and pull your shoulders back.
5. If possible straighten your arms, tilt your head back and fix your gaze up towards the ceiling. Hold the pose for 10 to 20 seconds.
6. To release the pose, inhale and gently bring your head, chest, and abdomen back to the floor.
7. Relax.
Tips
1. If your neck feels strained, keep your gaze either forward or on the floor.
2. If you are just starting, you may not be able to bend far. Just keep practicing and you will develop flexibility over time.
3. If you use only your arms to keep you lifted, then you will have curved shoulders. So, use the muscles of your back to lift you into the pose with your arms only supporting you.
4. Keep your chest out and body relaxed.
Benefits
1. Tones the abdomen and strengthens the spine.
2. Improves the flexibility of the abdominal muscles and makes them firm.
7. Trikonasana (Triangle pose)
")
Instructions
1. Start by standing on the mat with your feet hip-distance apart and arms beside you.
2. Now step your feet apart about 4 to 5 feet.
3. Turn your right foot 90 degrees so that your toes point towards the top of the mat. Position your left foot at 45 degrees. Make sure your heels are aligned with each other.
4. Raise your arms to shoulder level, so that they are parallel to the mat and form a T shape.
5. Exhale and start leaning your torso over your right leg without bending or curving your back and keeping your legs straight.
6. Roll your ribcage open towards the ceiling.
7. Lower your right hand towards your right shin/ankle/toes/ floor inside or outside the right foot. Reach your left hand towards the ceiling, keeping your gaze on the left hand. Keep your left arm in line with the shoulders.
7. Hold for 5 to 10 breaths or longer if possible.
8. To release, inhale, press through your left heel as you rise and bring your arms down and feet together.
9. Repeat on the other side.
Tips
1. Keep your core engaged and extend your spine.
2. If it is uncomfortable to gaze at the top of your hand, look down.
3. Do not curve your back.
4. You should soften the front knee slightly so that your hamstrings get a good stretch but at the same time you don’t put pressure on your knee joints.
5. Check your hip alignment. Your hip should not jut out to the side. If that happens bring your hip back toward the midline.
6. If you think you are losing your balance shorten your stance by bringing in your back leg closer.
7. If you have tight hamstrings or feel tightness in your hips then place a block behind your front leg and rest your bottom hand on the block.
8. Do not practice this pose if you have hip, knee, or ankle injuries or if you suffer from balance or standing issues, have low blood pressure, headache, or diarrhea.
Benefits
1. It also helps to reduce the fat from the tummy.
2. The pose improves digestion due to its twisting motion.
The Takeaway
Nothing feels better than having a fit body with a flat tummy. You too want a flat tummy. Don’t you? You don’t get a protruding belly overnight, so don’t expect it to disappear overnight. Set modest goals and work towards them. As you deepen your practice and develop mindfulness, you will be able to resist unhealthy foods and develop mindful eating. Being in tune with your body will help you improve your nutrition choices and contribute to a healthier lifestyle.
Like any exercise program for reducing belly fat, engage in these yoga poses 4 to 5 times a week for an hour every day. Your metabolism will be raised through these poses and you will see your body changing shape and your belly go flat.