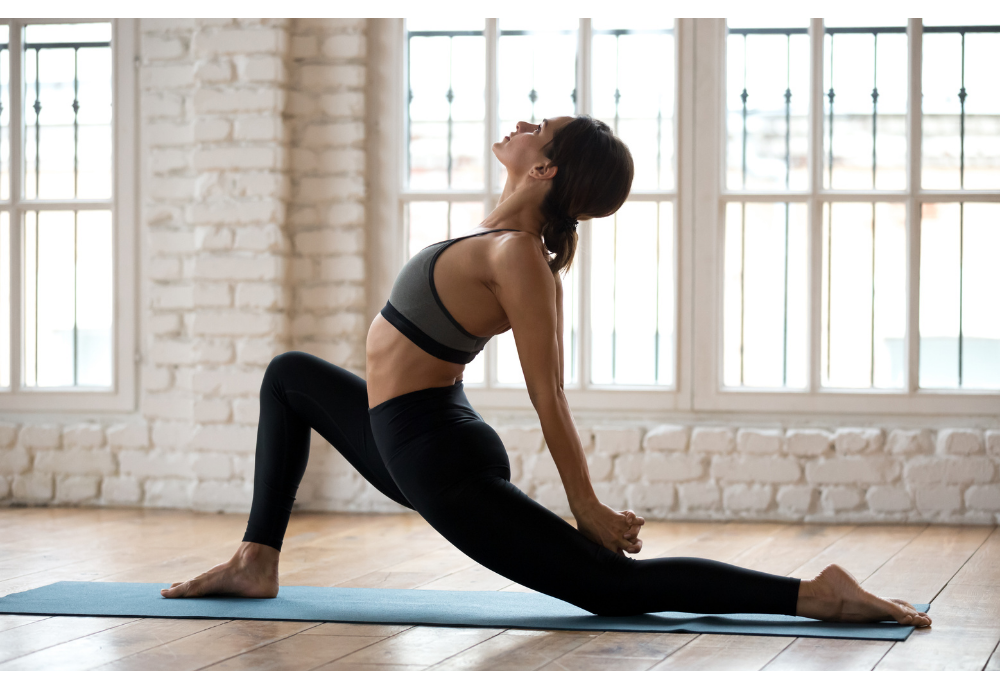
Many people have tight, stiff, and inflexible hips. The biggest cause of this tightness is a sedentary lifestyle. Tight hips aren’t just uncomfortable but can also lead to all sorts of pains and aches. The tightness of hip flexors is also the cause of almost all postural and movement-related issues. But there’s good news! There are a lot of yoga poses that you can do to relieve discomfort, reduce tightness, and increase mobility in your hips.
What are Hip Flexors?
Hip flexors are a group of muscles that allow flexion at the hip joint. These muscles originate from the lower back and hip girdle and run down to the inside of the femur. Hip flexors help in lower-body movements like walking, running, squatting, and kicking. Tight hip flexors can cause lower back pain, hip pain, injuries, and limited mobility. However, stretching them can help relieve and prevent hip and back pain, and sciatica.
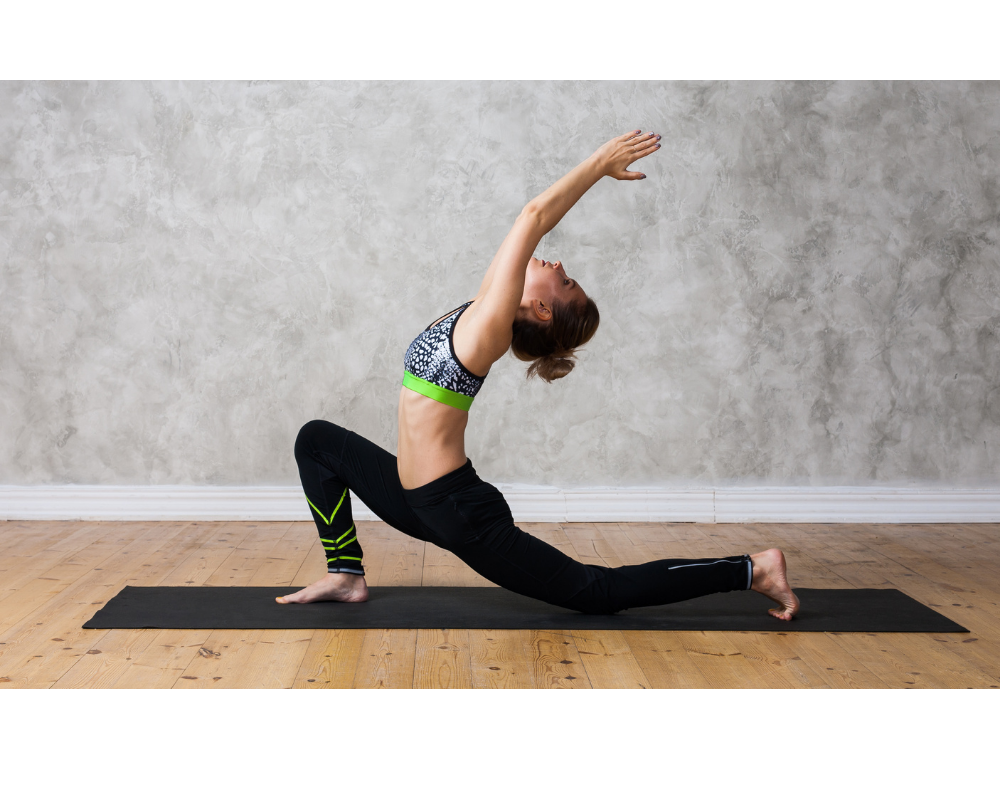
1. Low Lunge (Anjaneyasana)
Instructions
- Start with Downward-Facing Dog Pose (Adho mukha svanasana) and step your right foot forward and lower your left knee to the floor, sliding the left foot back. Keep moving your left leg backward until you feel a nice stretch. Make sure your right knee is directly over the right ankle and not moving forward toward the toes.
- Keep your hips low and square.
- Inhale and engage your lower abdomen and lift your chest away from the thigh. Raise your arms alongside your ears. Draw your tailbone down toward the ground.
- You can also place your fingertips beside you for support or place your hands on your right knee.
- Keep your gaze in front or up and move into a gentle backbend. For a deeper stretch, you can extend your right foot forward.
- Hold the position for a few seconds. Exhale and bring your hands down and step back to Downward Facing Dog.
- Repeat on the other side.
Benefits
- Stretches your hamstrings, quadriceps, hips, and groin.
- Builds strength of the muscles of the back knee.
- Improves balance and strengthens the core muscles.
- Stretches the calf muscles of the front leg.
.
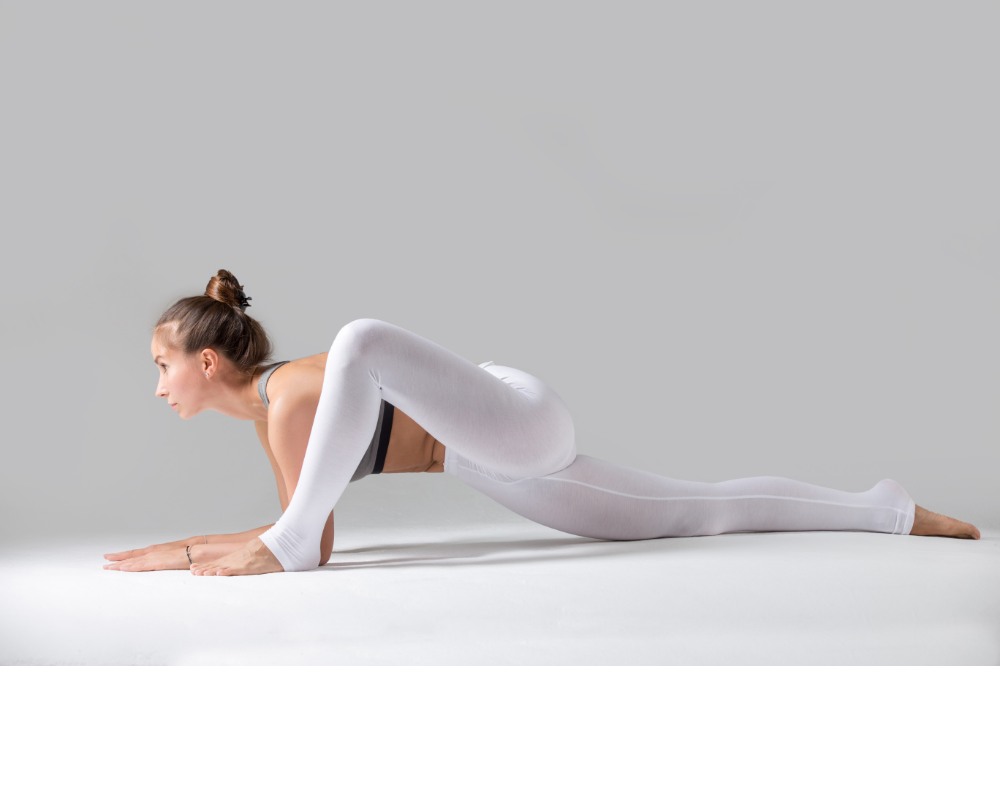
2. Lizard Pose (Uttana Pristhasana)
Instructions
- Come into Downward Dog Pose and inhale.
- Exhale and step your left foot forward to the outside of your left hand. Your left knee should be bent at a 90-degree angle.
- Now lower your right knee to the mat and keep your arms and back straight.
- Gently lower into your forearms, keeping your back flat and your head and spine in one line. Spread your palms out on the floor.
- For a deeper stretch straighten your right leg by pressing up onto the ball of your right foot. This will help ensure that your hips don’t sink on the floor. Keep the chin lifted and try to take the chest forward. Hold for 5 deep full breaths.
- To release exhale and straighten your arms so your wrists are stacked right under your shoulders.
- Inhale and come back into Downward Dog Pose.
- Repeat on the other side.
Tips
- If your back knee feels uncomfortable, place a folded blanket underneath the knee.
- In case your forearms can’t reach the floor, keep your arms straight with palms flat on the ground.
- You can also rest your forearms or hands on a stable surface or a yoga block.
Benefits
- Excellent pose for stretching the hip flexors, quadriceps, and hamstrings.
- Including this pose regularly in your yoga practice can enhance hip flexibility and strengthen your leg muscles.
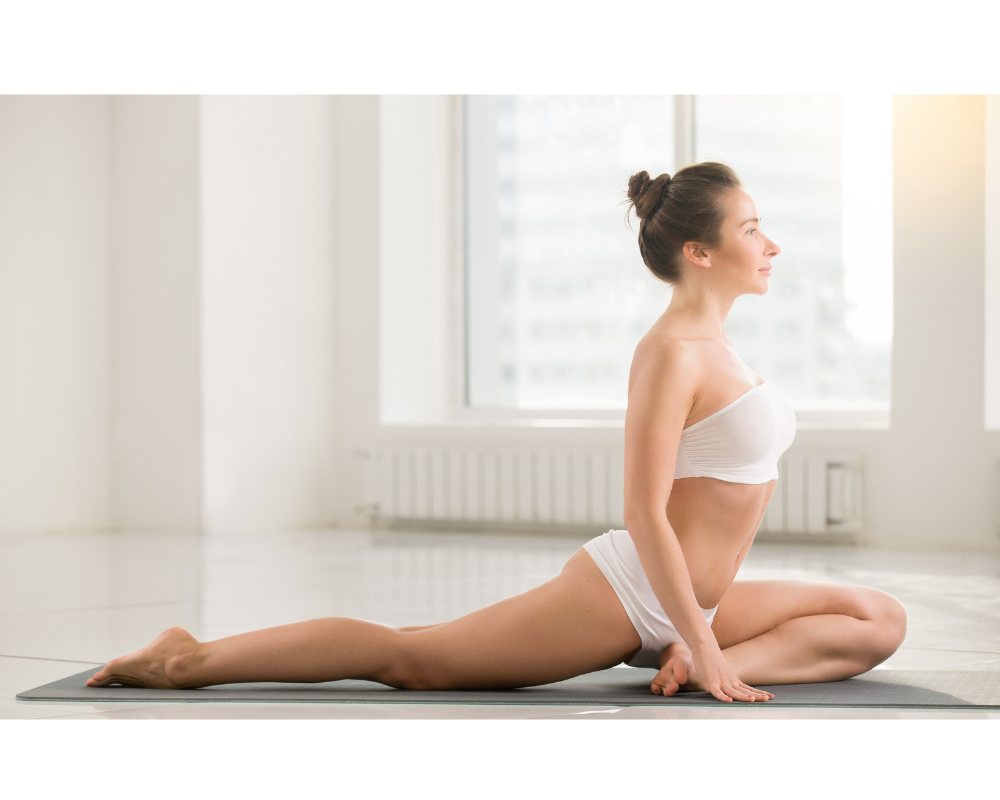
3. Half Pigeon Pose (Ardha Kapotasana)
Instructions
- Start with Downward Facing Dog and bring your left foot towards your left wrist and then lower your knee and shin on the mat.
- Straighten your right leg back and point your foot back.
- Keep your left foot close to the front of your right hip.
- Align your left knee with your left hip and keep your left foot flexed.
- Take your fingertips firmly to the floor on both sides. Inhale and raise your torso away from the thigh.
- Lift your pubis toward the navel. Stay for few breaths.
- Exhale and try to release the tension in your left hip.
- To release the pose, push back through the hands, raise your hips and go back into the Downward dog pose.
- Repeat on the other side.
Benefits
- Extremely effective hip opener.
- Stretches your groin, quads, and hamstrings.
- Eases tension in your hips.
- Strengthens your knees.
Tips
- Slide a block under your bent leg for support to find a comfortable resting position.
- Avoid the asana if you have high blood pressure, knee injuries, shoulder problems, and neck problems.
- Avoid raising your hip too far from the ground.
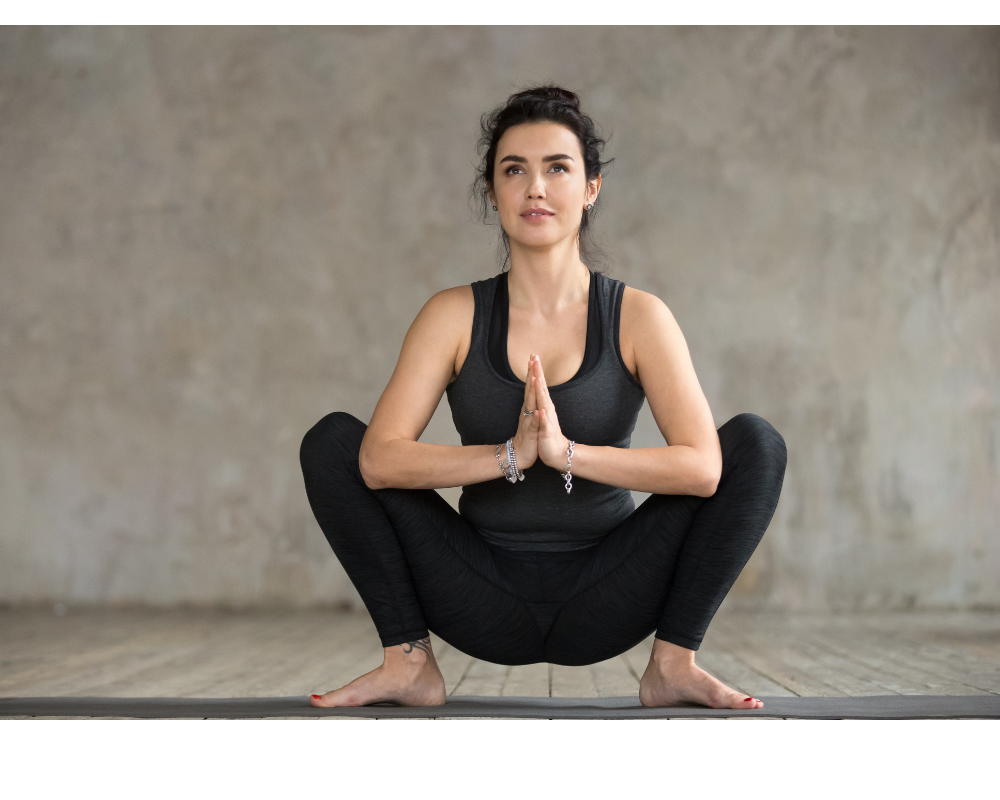
4. Garland Pose (Malasana)
Instructions
- Stand on the mat with your feet about the mat’s width apart.
- Inhale and as you exhale bend your knees and lower your hips toward the floor to come into a squat.
- Your toes will turn out but that’s okay as you can gradually work on keeping the feet almost parallel.
- Now bring your upper arms inside the knees and bend the elbows to bring the palms together in a prayer position.
- Keep your spine straight, shoulders relaxed, and ensure your butt does not move toward the floor.
- Continue pressing your upper arms into your thighs.
- Stay in this position for a few breaths.
- Try to repeat the pose a few times.
Benefits
- A deep squat that targets the ankles, quads, groin muscles, and hips.
- Opens the hips and groins
- Strengthens the feet and ankles.
Tips
- Put a block or two under your hips for more support if necessary.
- If you have balancing issues, try doing the pose against a wall.
- If you suffer from a knee or low back injury, do not push yourself in a deeper squat and avoid any jerky movements.
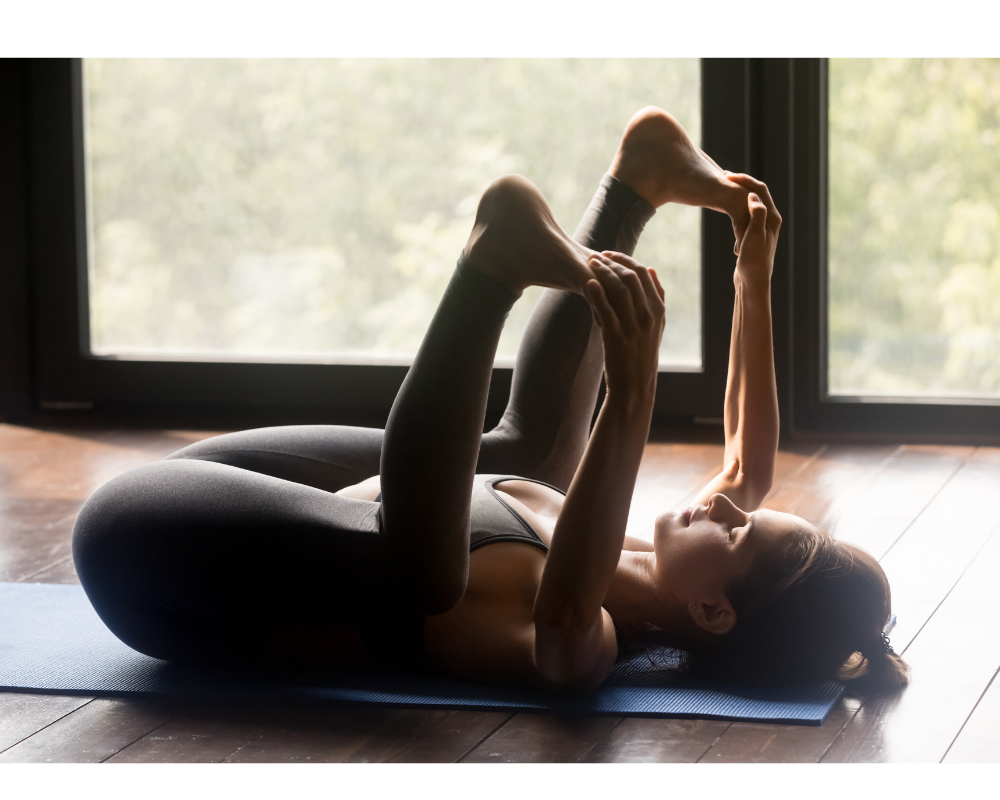
5. Happy Baby Pose (Balasana)
Instructions
- Lie flat on your back. Inhale and as you exhale, bend your knees into your stomach.
- Inhale and grab the outsides or top of your feet with your hands. Ensure your ankles are directly over your knees and try to bring them towards your armpits.
- Flex your feet and keep them facing the ceiling. Hold the pose for a few breaths.
- To release, exhale and bring your arms and legs to the floor.
Benefits
- Brings a gentle awareness to the hip joints and opens the hips.
- Stretches the spine and inner groins.
- Helps relieve stress and fatigue.
Tips
- If you can’t hold your feet easily with your hands, try holding them with yoga straps wrapped around both feet.
- For a deeper stretch, let the legs open a bit wider.
- Do not practice this pose if you have a chronic injury or inflammation in the legs, neck, or shoulders.
6. Frog Pose (Mandukasana)

Instructions
- Start in a tabletop position on your hands and knees. Ensure that your hands are below your shoulders. Stay in this position for a few breaths.
- Inhale and exhale gently moving your left and right knee apart from each other. Lower down to your forearms with your palms either pressing together or flat on the floor.
- Continue breathing whenever you feel the stretch. You will feel a powerful stretch in your inner thighs and groin. Do not force yourself into a deeper stretch.
- Lengthen the spine and try to extend the crown of your head and your tailbone in the opposite direction.
- Stay here and breathe deeply and for as long as your body comfortably desires.
- To come out of the pose, slowly bring your knees closer and return to the tabletop position.
Benefits
- Opens your groin and hip.
- Stretches the muscles in the adductors, hips, and core.
Tips
- If you have a knee injury, you can place a blanket on the yoga mat for extra padding.
- Do not hold your breath while holding the pose. Feel the stretch and breathe deeply.
- If you have limitations in your knees and hips then do not push your knees further apart.
- If you have a problem placing forearms on the ground put blocks underneath them.
- If you cannot lower your torso and hips close to the ground, bring your feet closer to decrease the intensity of the stretch.
- You can also try doing half frog pose in which one leg is in frog pose whereas the other one is extended straight back. This will allow the torso to rest on the ground.
7. Side Lunge (Skandasana)

Instructions
- Start with Prasarita Padottanasana (Wide-legged forward bend). Now bend both knees in a half-squat position.
- Bring your hands down in front for balance and support.
- Turn your right foot outward, bend the knee and slowly shift your weight toward the right side with your right foot completely flat on the ground.
- Keep your left leg straight with your left foot pointing toward the ceiling. You can also hold your left foot with your left hand and grab your right knee with your right hand.
- Press your hips back, keep your spine lifted, and your core engaged. Stay in this position for a few breaths.
- With the support of your hands shift to the other side.
Tips
- If you keep losing balance put blocks under your seat.
- People with knee, ankle, groin, hamstring, and hip injuries should avoid this asana.
- If you can’t get into a full squat, try to stay up on the ball of the foot of the bent leg.
- If you find your balance bring your hands in Anjali mudra (palms together).
Benefits
- Opens the hips and stretches the hamstrings.
- Helps you build core strength.
- Improves your balance.
The Takeaway
In conclusion, the stronger and flexible your hip flexors are, the better chance you have of keeping them injury-free and ensure that your body functions optimally. These simple yoga poses can help you build flexibility and open up tight hips. Do remember to breathe through each pose. Additionally, you can include some physical activity like a brisk walk, skipping, etc and your hips will thank you!

